Introduction:

This article shows you the top 7 digital products that you can create using AI, and some of these products have the potential to earn you a passive income of up to $220,000 per month. One of the biggest benefits is that you can create the product once and get paid for it multiple times for the same product. What if I told you that AI could help you create these products quickly and easily? Yes, that’s right! I’ll also show you how much money and sales you can expect to make from each product, as well as how to create them.
01 The First Idea on Our List is Creating a Clipart:
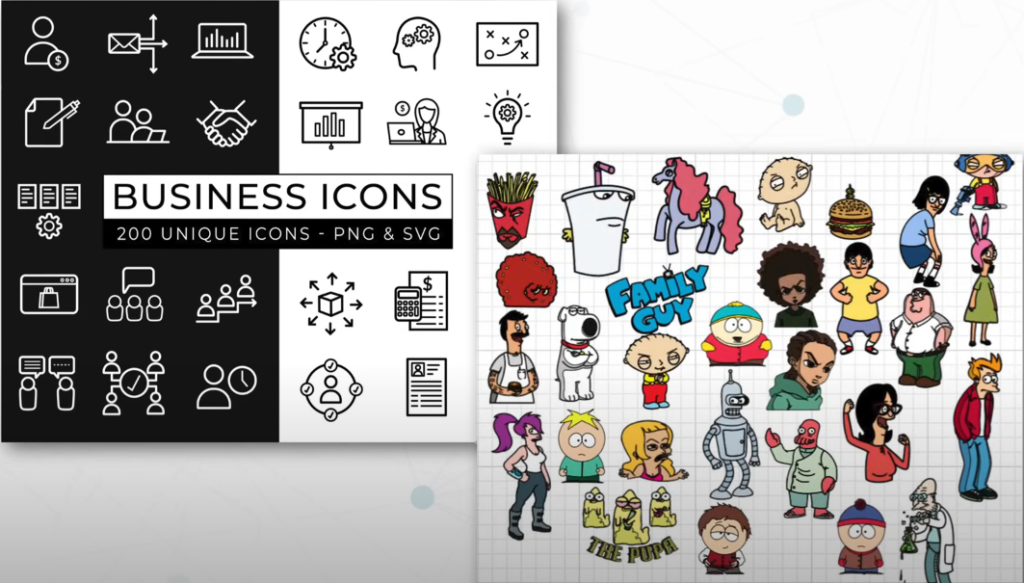
People use clipart for their presentations, website designs, social media, and more. These images are added to make projects look visually appealing. You can create a variety of clipart images such as icons, cartoons, and more. Additionally, you can sell them online and earn a good income from them.
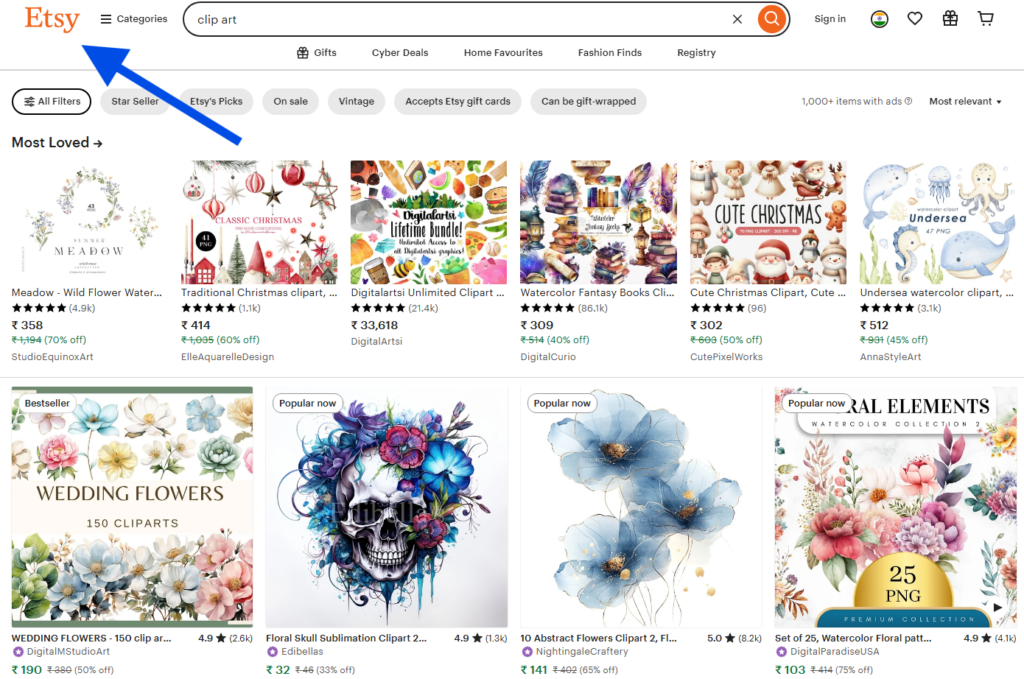
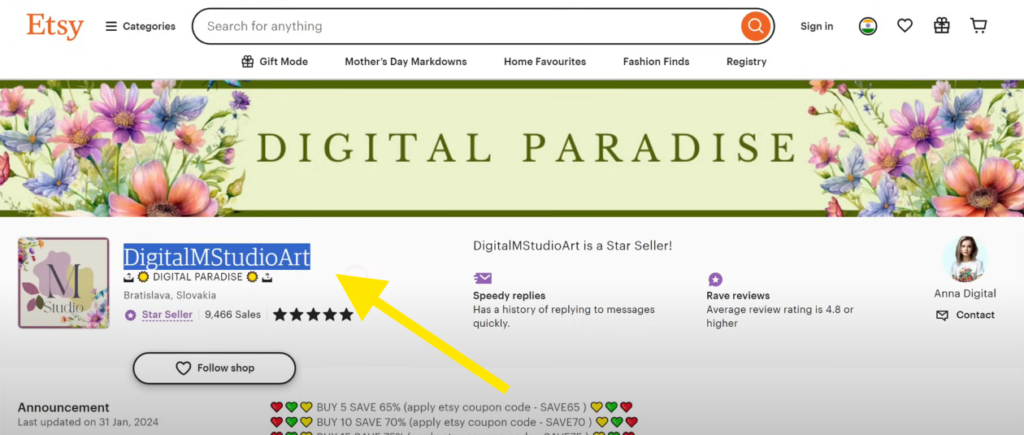
Before I show you how to create clipart, let’s see how well these clipart images are selling online. To check the clipart images that are selling online, there’s a website called Etsy, where you can buy and sell digital products. Just click the link Etsy, and it will take you to the website. Now, search for “clipart,” and you will find different clipart images that people are selling on Etsy. Just choose one, and here you’ll find the name of the seller. Click on it, and you’ll see the total number of sales they have made, as well as the clipart images they are selling.
Revenue in Clip Art Images:
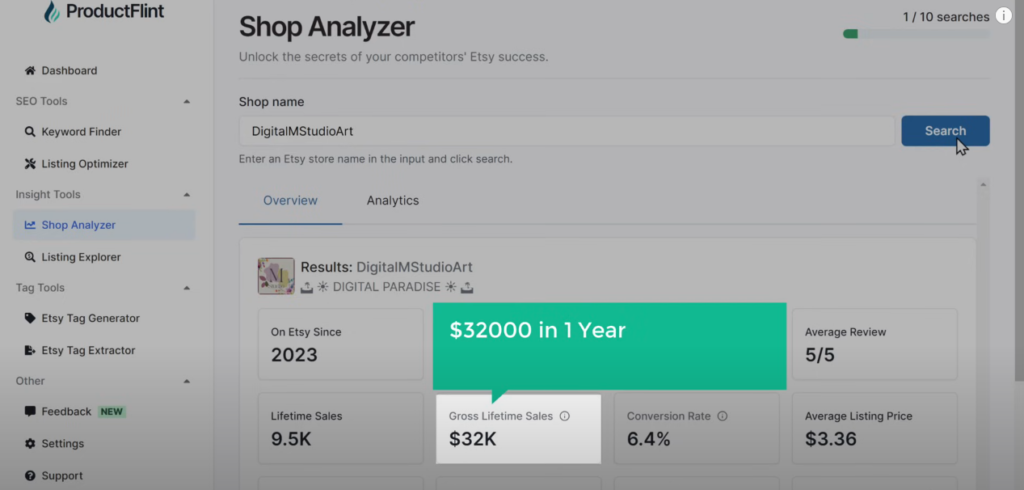
Once you know how well these clipart images are selling, let’s see how much revenue is being generated from these clipart images. ProductFlint sees the revenue of this shop, goes to the Shop Analyzer, then copy and pastes the shop name here and click “Search.”
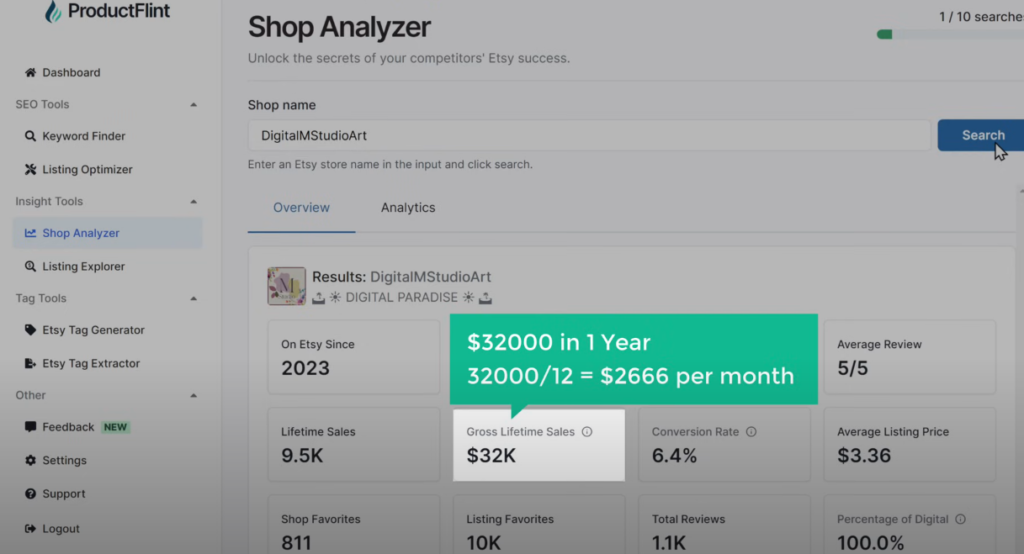
You can see all the information about the shop, including the gross revenue they have made, which is $32,000 in one year, equaling $2,666 per month. In the same way, you can find out the sales of other shops and even other digital products.
Create Clipart Images:
Now that you know how much money can be made selling clipart, let’s see how we can create clipart images. To create your clipart images, just click the link, and it will take you to this page.
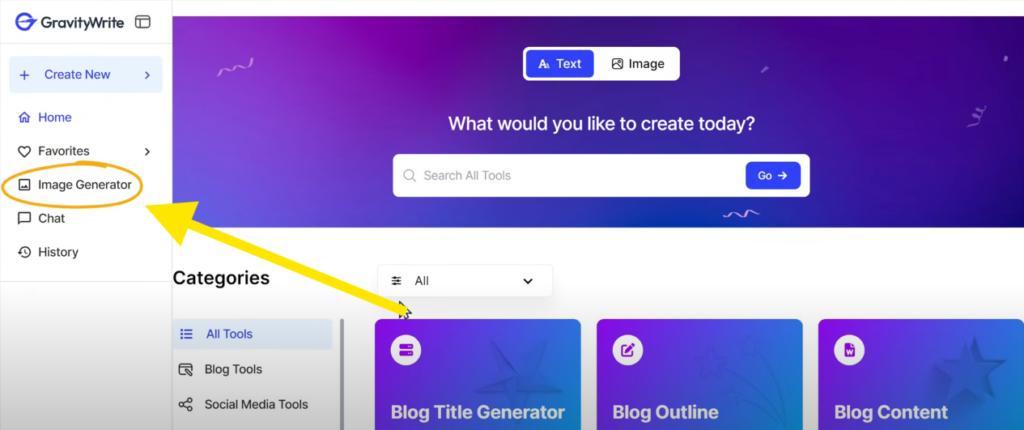
Now, go to the Image Generator, and here you can generate your images. There are three methods to generate the clipart.
01 The First Method:
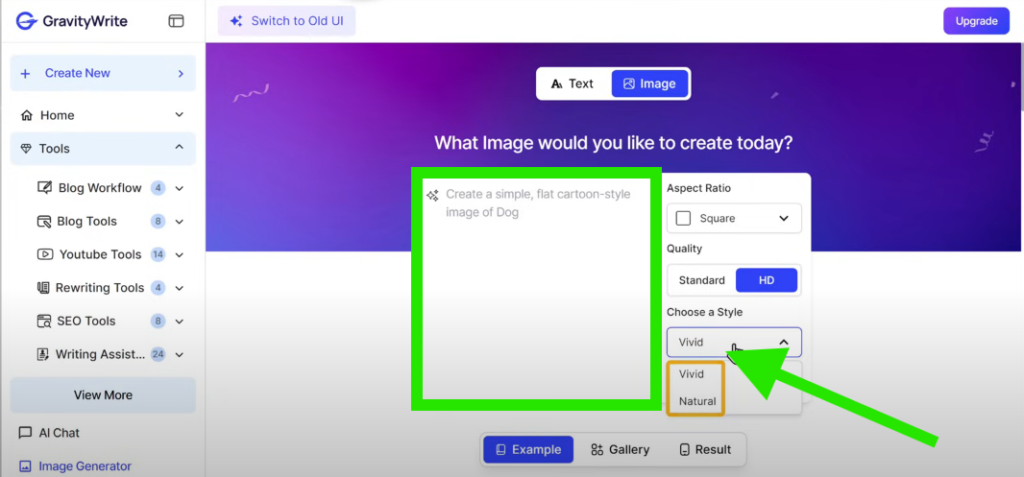
The first method is to describe the type of clipart you want. Here, just type how you want your clipart to look. Then, you can choose a style for your image, whether you want it to look vivid or natural. I’m going to select “Natural” and click “Generate Image.”
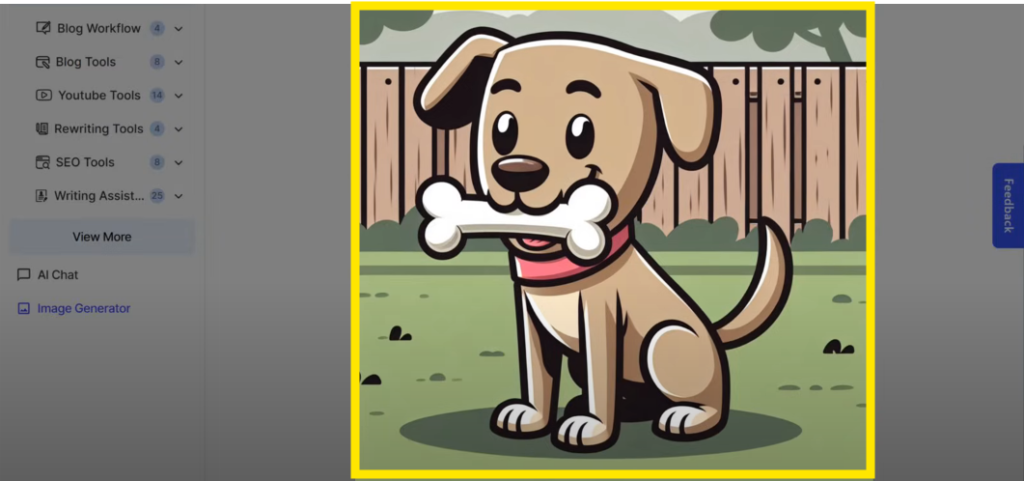
Within a few seconds, you can see that it has generated the clipart image, and it looks great! Similarly, you can generate different kinds of clipart images just like this.
02 The Second Method:
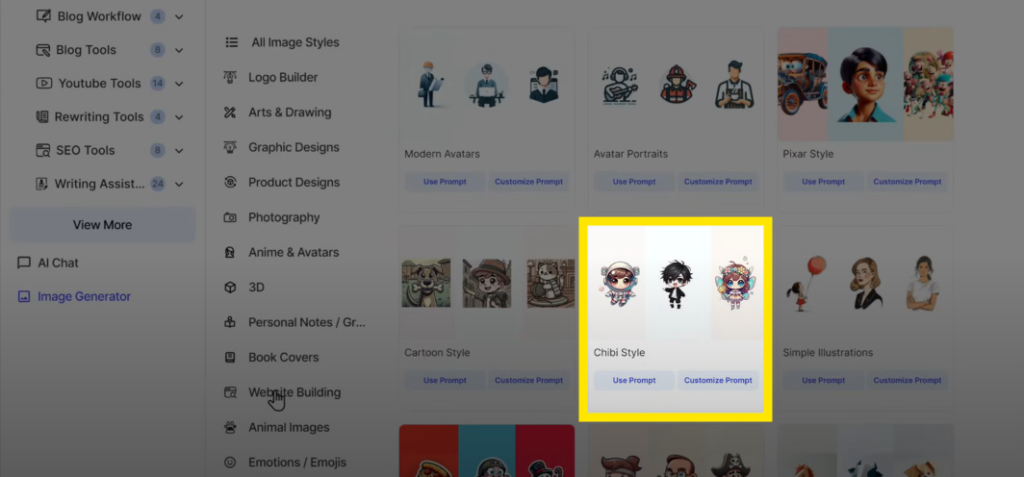
Now, let’s look at the second method, which is by using pre-made examples. Since we want to generate clipart, just choose the “Clipart” option. Here, you’ll find different styles of clipart that you can generate. I’m going to choose this one.
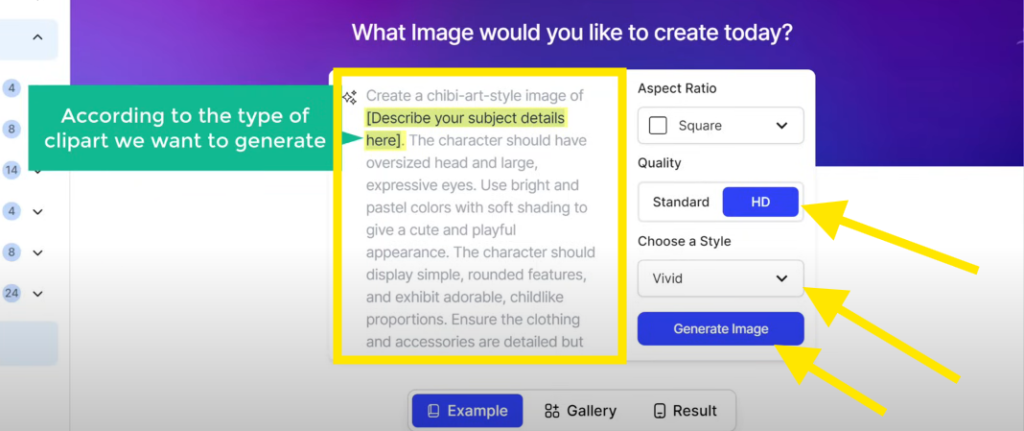
So, click “Customize Prompt,” and you will see the prompt that can generate this type of image. Now, all we have to do is replace the text in the brackets according to the type of clipart that we want to generate.
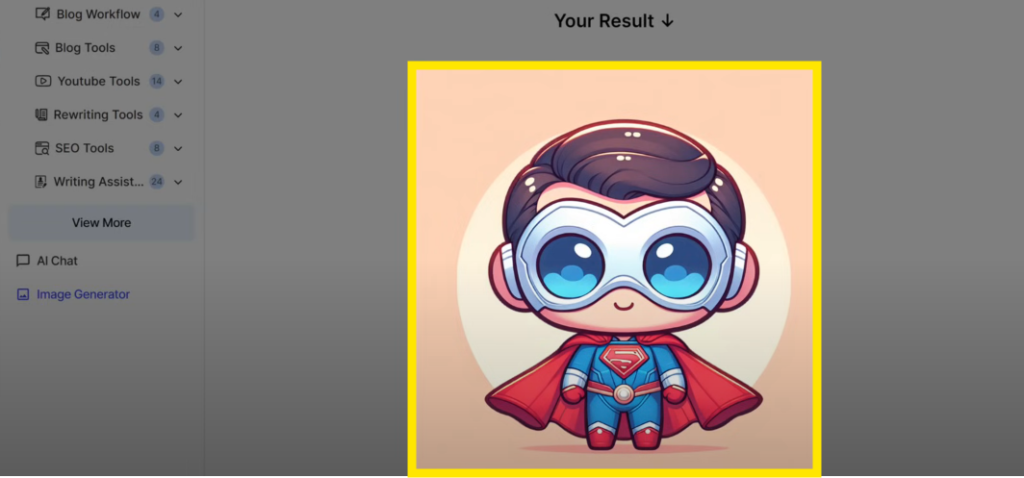
For example, I’m going to ask it to create a clipart of Superman in a “gibl” art style. Then, change your style to “Natural” and click “Generate Image.” As you can see, we have got the clipart image as we asked for.
So, this is how you can create clipart using ready-made designs. Let’s say you want to get more unique clipart designs. You can work with an AI assistant to create unique clipart designs that no one has created before doing this.
03 The Third Method:
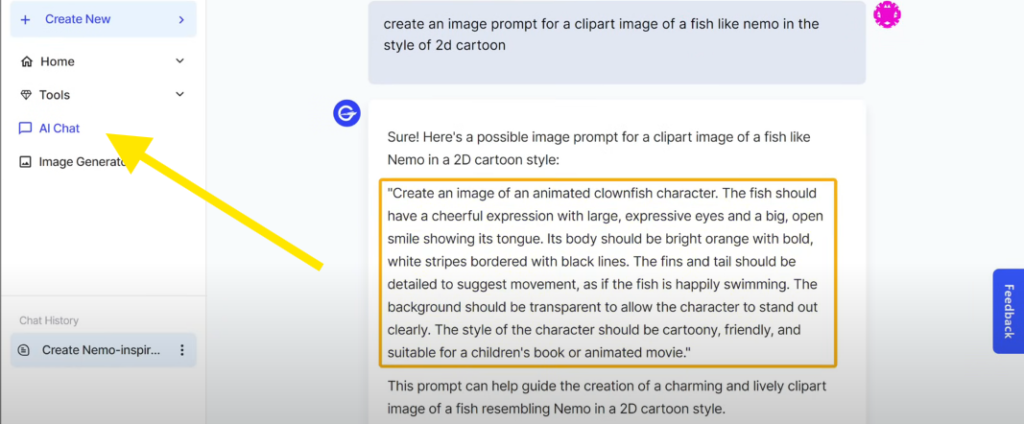
let’s look at the third method to generate image prompts, which is by using the “AI Chat” option. Let’s go to AI Chat. Now, to create unique designs, you can ask the AI for an image prompt for the clipart. For example, I’m going to say, “Create an image prompt for a clipart image of a fish like Nemo in the style of a 2D cartoon.”
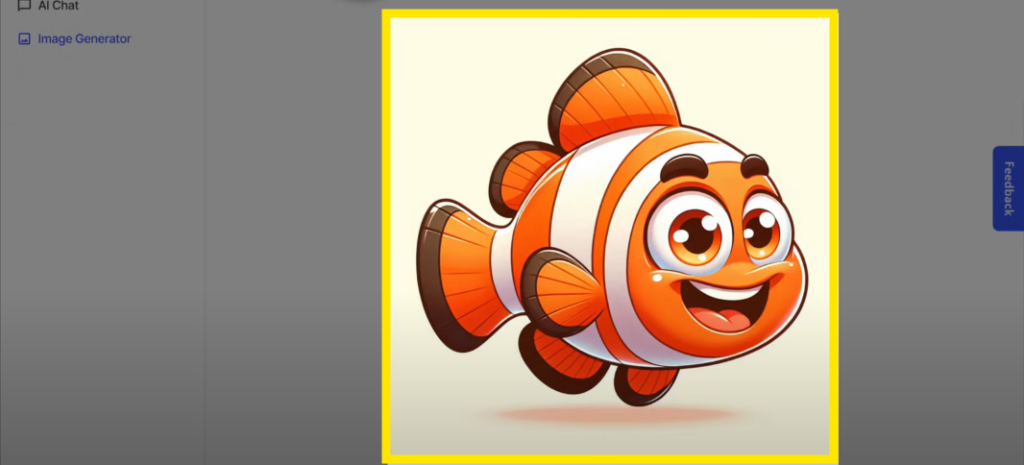
Now, we can use this prompt to generate the image. To do that, copy the prompt, go to the image generator, and paste it there. Then, select the quality to HD, change the style to “Natural,” and click “Generate Image.” As you can see, we have generated a clipart image, and it looks good, right? This is how you can use AI chat to create unique clipart images.
Okay, so these are the 3 ways in which you can generate images. Once you have created the clipart image, you may notice that it has a white background.
Remove the Background of Your Clipart:

When you sell clipart to your customers, your image should have a transparent background. This is because, when people try to use your image on other backgrounds, the white layer will show, which doesn’t look good. However, when we remove the background from the image, it will look like this, which is much better.
To remove the background, we have built a background removal option in Gravity. Simply click on the “Background Removal” option, and you will see that the background has been removed. Now, if we download the image, you can see that it no longer has a background. This is how you can remove the background from your image.
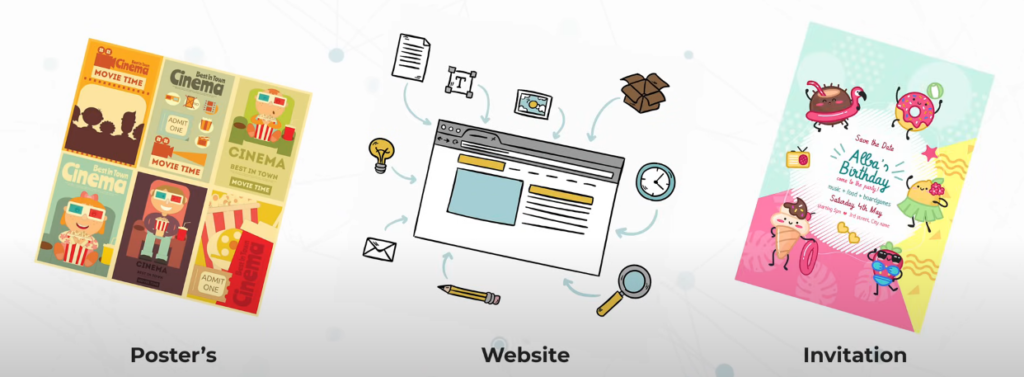
Similarly, you can create different types of clipart for people to use in their posters, websites, invitations, and more.
Make Money Using Clipart
Once you’ve created your clipart images, the next step is to make money using these images. There are a few platforms where you can sell your images:
- Etsy
Etsy is a popular online marketplace where you can sell and purchase digital products. Note: If Etsy is not available in your region, you can use Gumroad to sell your digital products. - Selling Clipart on Etsy
Once you’ve created a shop on Etsy, here’s how you can sell your images:- Go to Shop Manager and click on Listings.
- Click on Add Listing.
- Once you reach the page, upload your clipart images that will be shown as a preview to buyers. For example, you can add a poster image of your clipart.
- Enter all the details about your clipart, and make sure you select Digital as your product type.
- After that, provide the remaining details about your product, including the description, price, and applicable taxes.
Once you’ve done that, the next step is to upload the actual clipart images for your customers, so they can easily download them after completing their purchase.
So, let’s upload the clipart images. Similarly, if you have created more clipart images, you can add them here.
Once you’ve uploaded the images, review your listing and publish it when it’s ready.
Now, if you go to Etsy and search for “fish clip art,” you can see that we have listed our clipart. This is how you can sell images on Etsy.
How Customers Can Purchase and Download Clipart from Etsy:
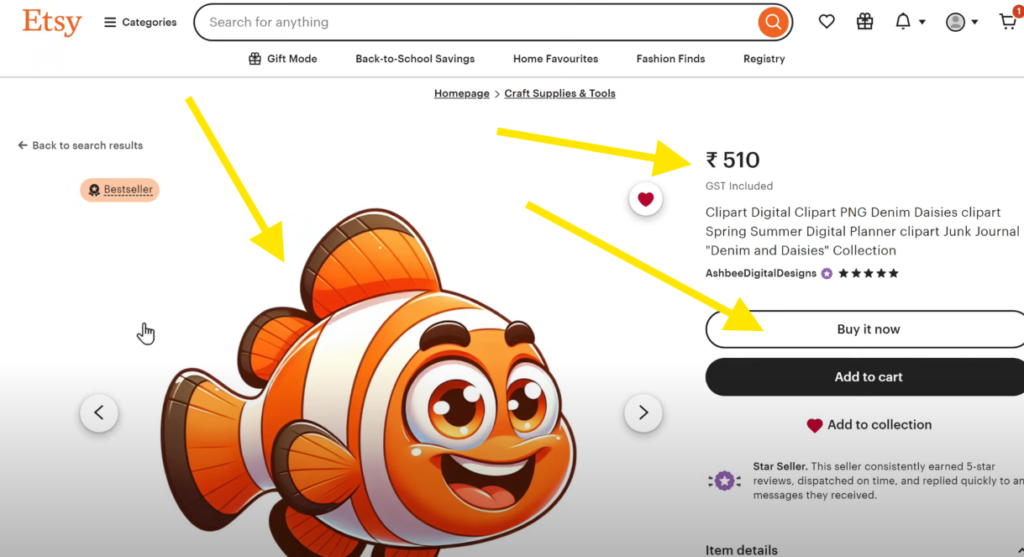
To purchase an image:
- The customer can click on the image.
- Select Add to Cart and complete the payment.
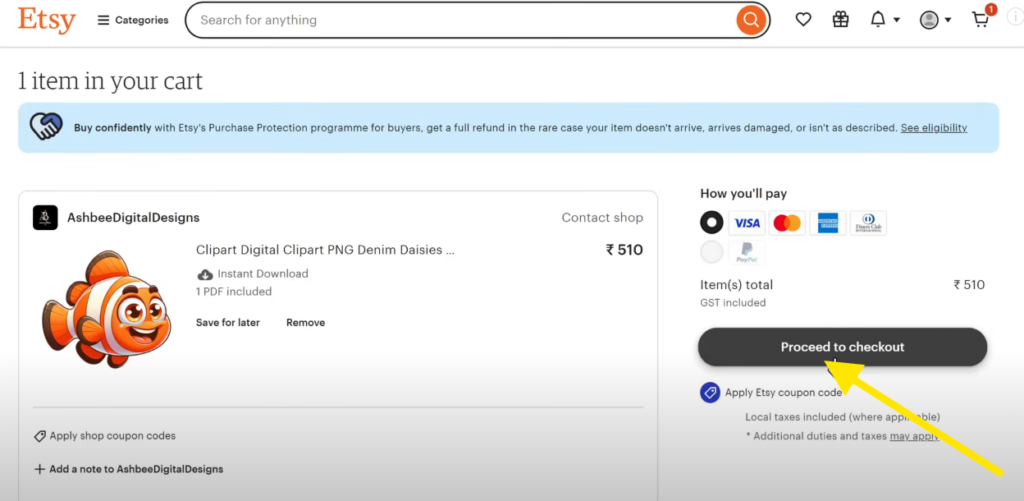
Once the purchase is complete, the customer will be redirected to a page where they can download the clipart.
- Let’s click on Download, and the clipart will be downloaded.
- As you can see, the clipart is now accessible.
This is how customers can purchase and download your images from Etsy.
Now that we’ve seen how to create and sell clipart images, you’re ready to start earning with your digital creations! Let me know if you’d like further assistance with refining this process or exploring other digital product ideas.
02 Creating Coloring Worksheets:
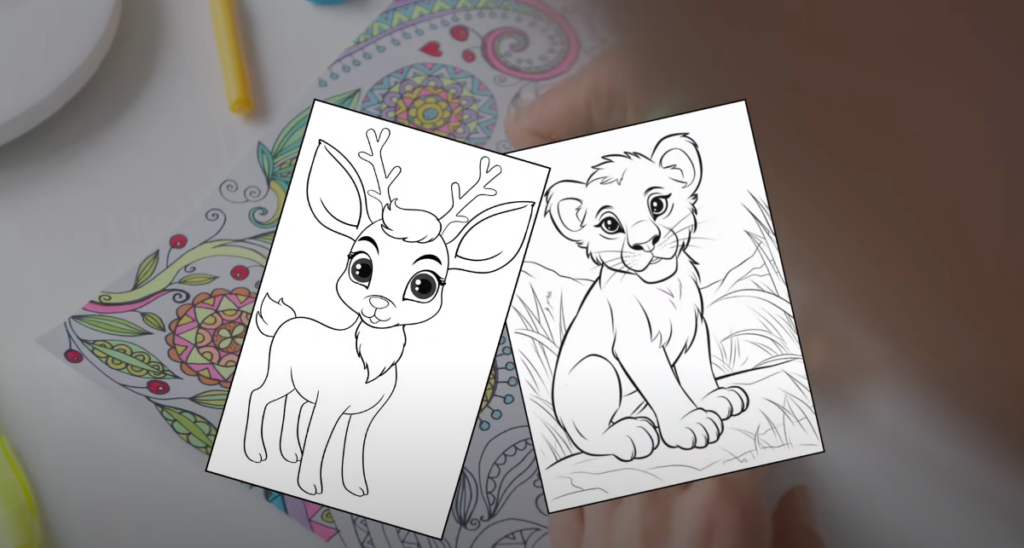
The next digital product you can sell is coloring worksheets. Creating and selling coloring worksheets is a simple and effective way to generate income, as they are in high demand in schools, daycare centers, and preschools.
For instance, here you can see some sample designs created by others. One shop has sold more than 25,000 coloring worksheets, generating $112,000 in just two years!
How to Create Coloring Worksheets:
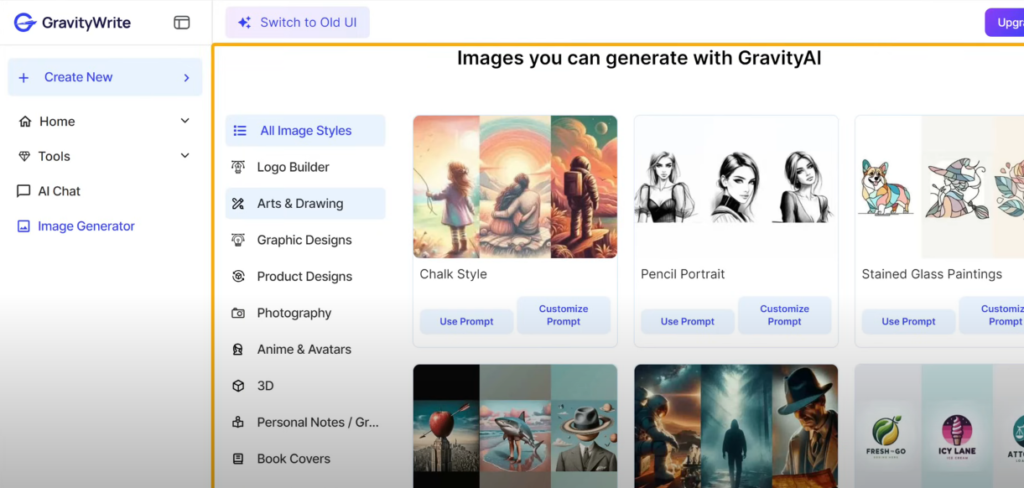
To create coloring worksheets:
- Open the Gravity R Image Generator tool.
- Just like we did for clip art, you can use any of the three methods to create your coloring sheets.
This time, let’s use the pre-made examples:
- Go to Arts and Drawing.
- Scroll down and find the option to create coloring book images.
- Click on Customize Prompt.
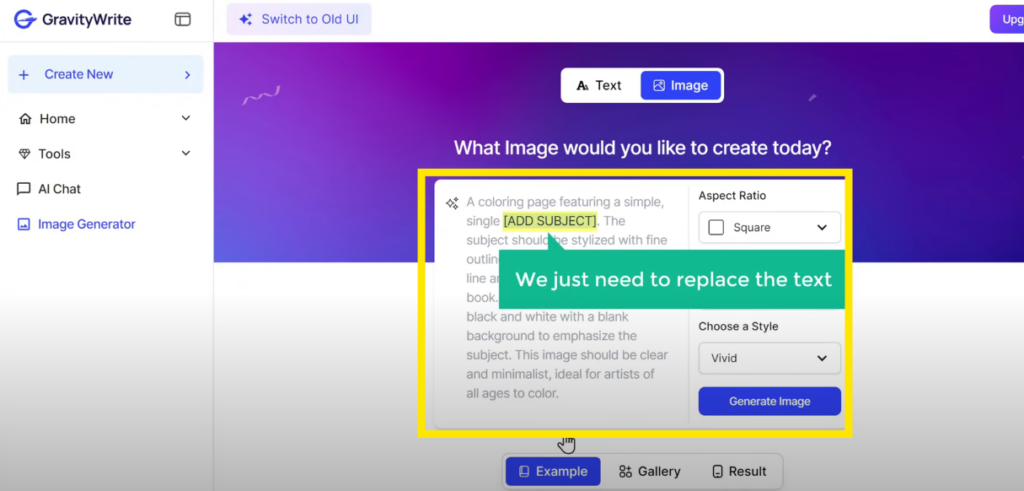
You’ll see a pre-filled prompt. Replace the text within the brackets with your desired content. For example, ask it to create a coloring worksheet of a baby elephant.
- Change the style to Natural and click Generate.
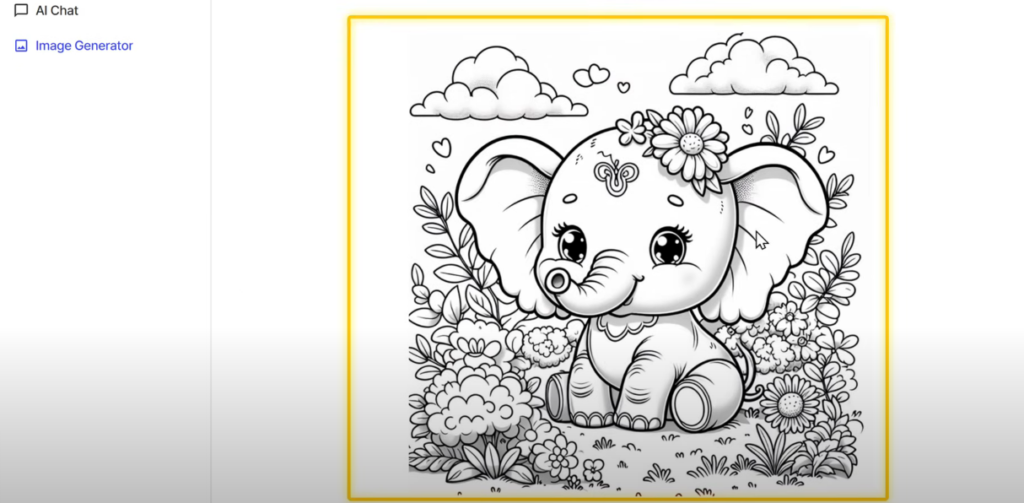
The image will be generated, and as you can see, it looks really cute! Once the image is ready, you can download it and sell it on Etsy or similar platforms.
With these simple steps, you can start creating and selling coloring worksheets using AI and earn a passive income.
03 Creating Wall Art:
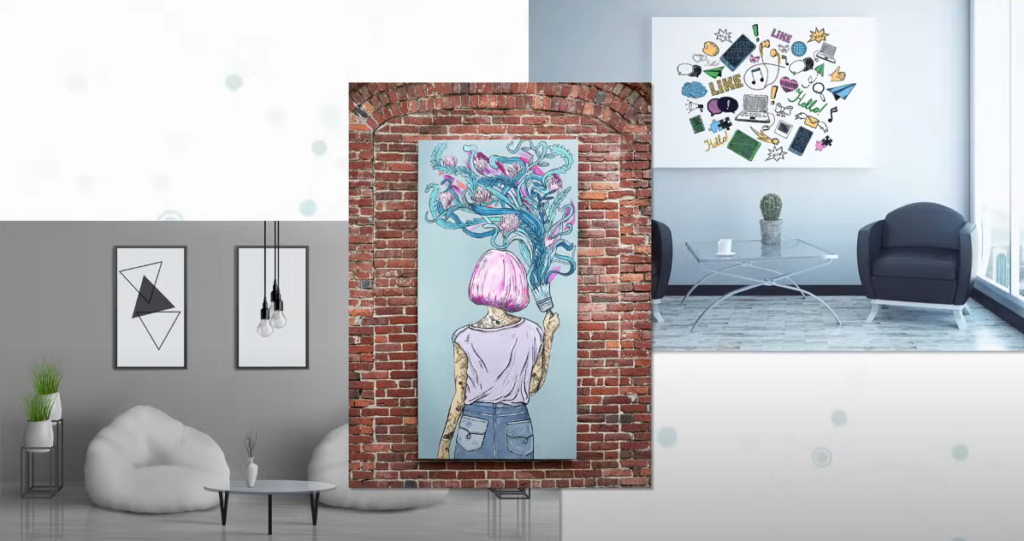
The next digital product on our list is wall art.
Putting up wall art is one of the easiest ways to improve spaces. It can transform any area—be it homes, offices, or public places—making it more appealing and lively. A well-designed wall art piece can turn a boring wall into something beautiful.
Why Wall Art?
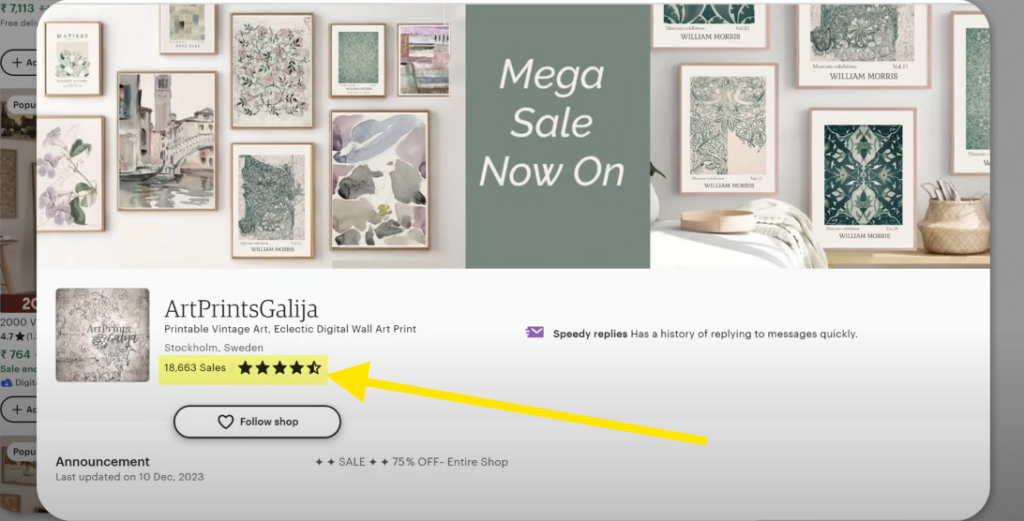
Wall art is highly profitable. For example, here’s a shop that has made 18,163 sales selling vintage-style wall art over 4 years.
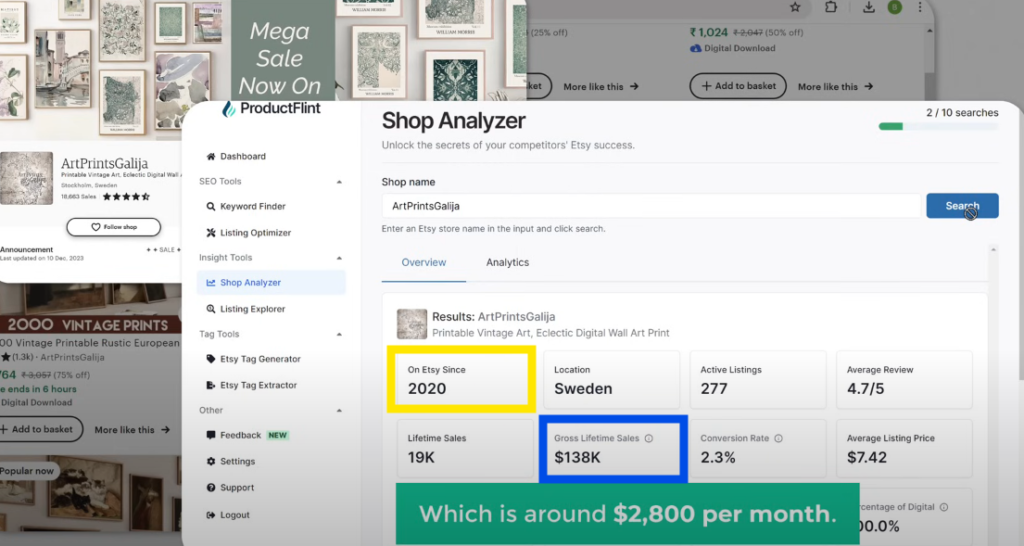
This has generated an income of $138,000, which is about $2,800 per month!
By creating simple and elegant wall art designs, you too can make a significant income.
To create your own wall art:
- Go to Gravity R.
- Navigate to Arts and Drawing and scroll down.
- You’ll find various wall art design options. Select the one you want.
For this example, let’s choose vintage art:
- Click on Customize Prompt.
- Replace the placeholder text in the brackets with your desired content. For instance, type “an oil painting of a woman” and click Generate Image.
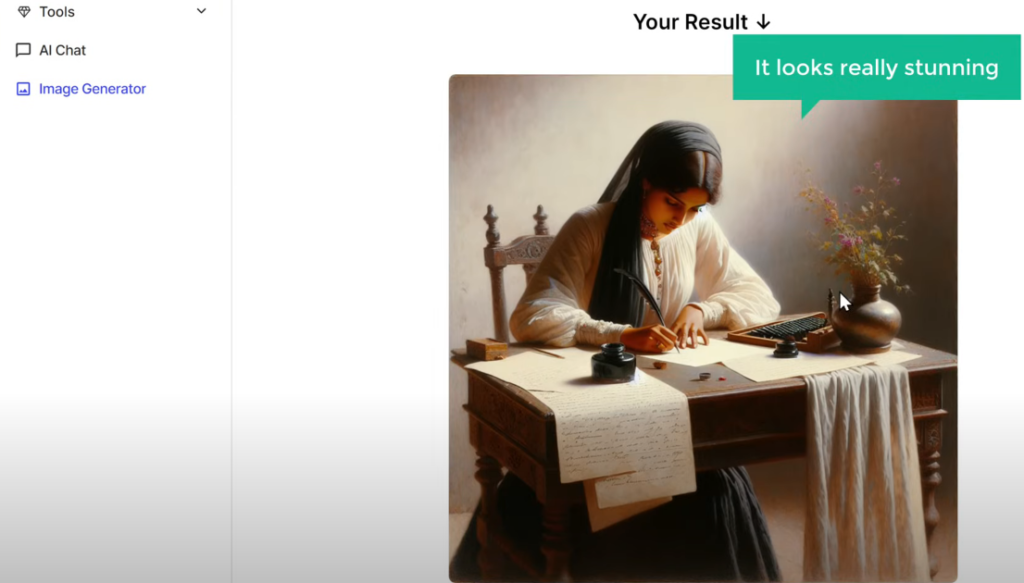
You’ll receive a stunning image of a beautiful oil painting! Once downloaded, instead of presenting the wall art to your customers directly, enhance its appeal by using mockups.
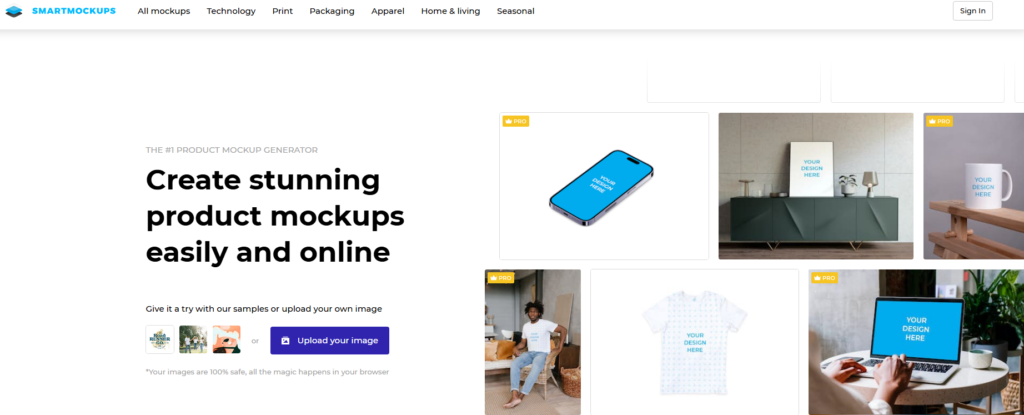
Mockups make your designs more attractive and help customers visualize how the artwork will look in real life. Use an online tool like Smart Mockups to create instant previews:
- Search for Smart Mockups online and visit their website.
- Select the object you want (e.g., frames for wall art).
- Upload your wall art, customize it, and download the mockup.
You can then use these mockup images as previews on platforms like Etsy. This strategy significantly enhances your presentation and boosts sales.
04 Creating Patterns:
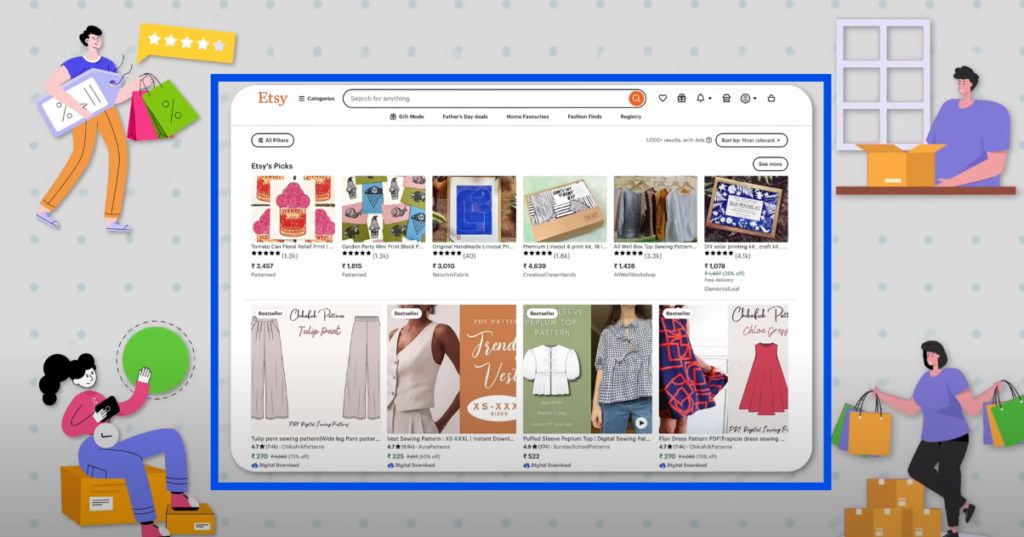
Another profitable digital product is patterns.
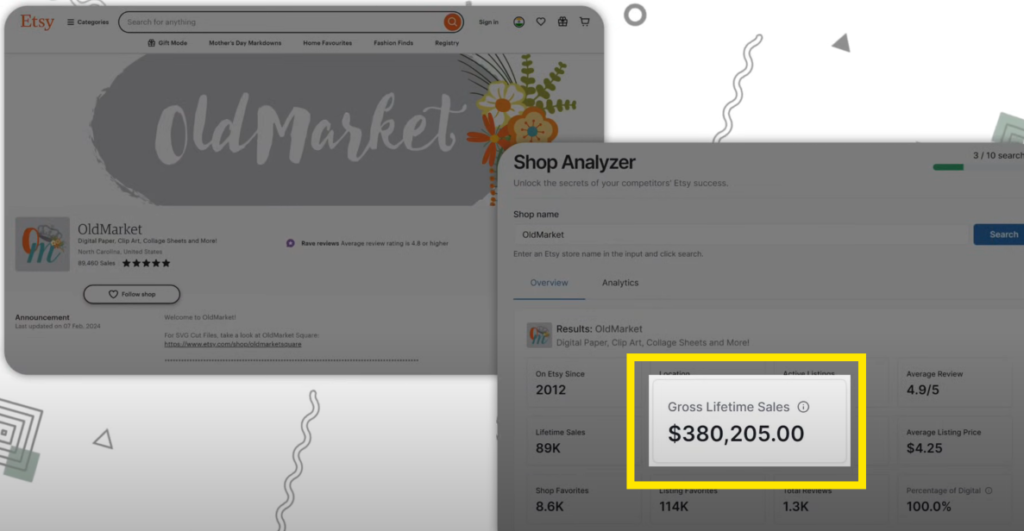
People purchase patterns on Etsy for various uses, including fabric designs, wallpapers, and gift wraps. For example, a shop called Old Market has made close to 100,000 sales, generating a gross revenue of approximately $380,000 over 12 years. That’s about $2,600 per month!
How to Create Patterns:
- Go to Gravity R and select Patterns.
- Browse the available pattern designs and pick one you like.
For example:
- Click on Customize Prompt.
- Replace the placeholder text in the brackets with your desired pattern description.
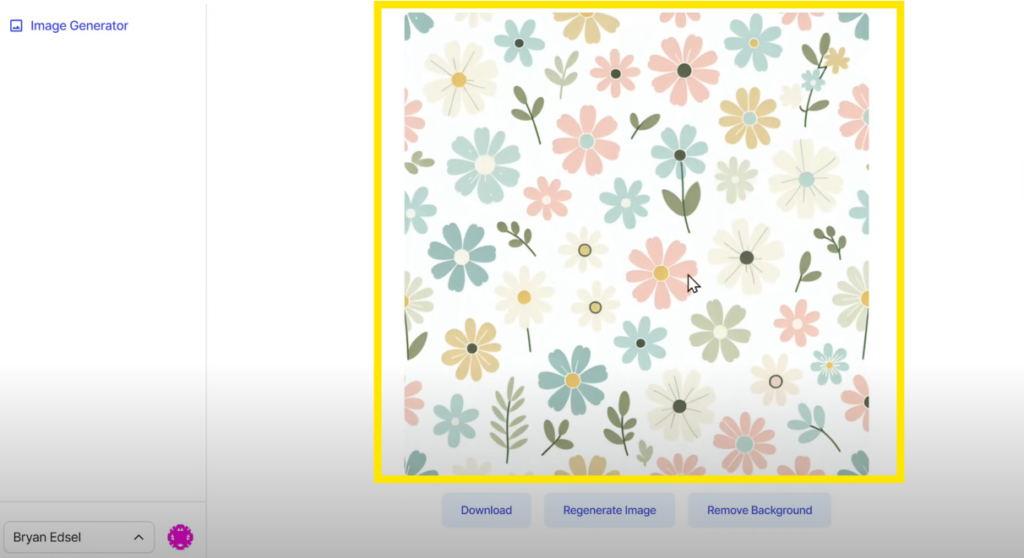
Let’s say you want a floral design. Enter “a floral pattern with pastel colors” in the prompt and generate the image. Once you have your pattern design, download it and start selling it online.
With these steps, you can create unique and appealing patterns, catering to various customer needs and boosting your income.
Creating Patterns:
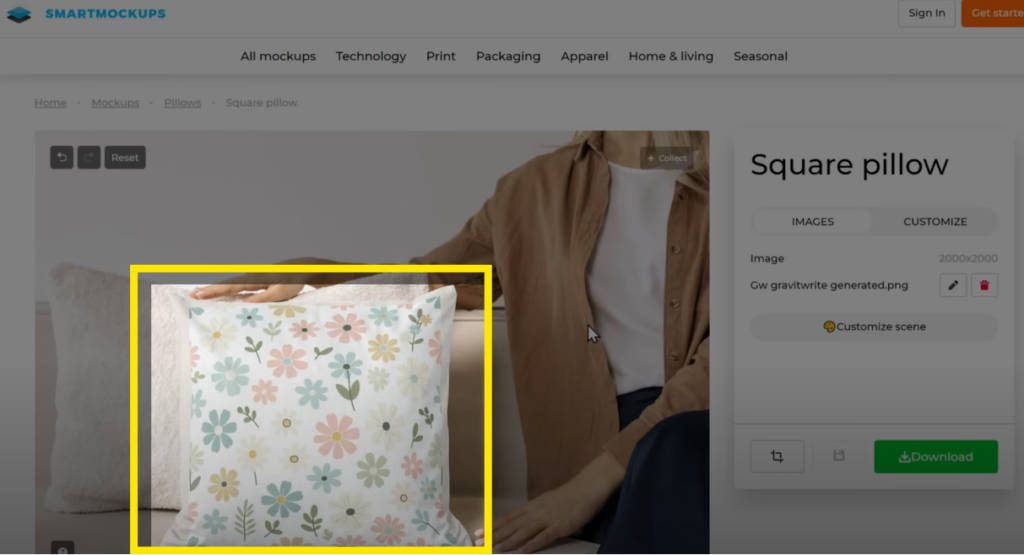
To create a pattern, let’s generate a design with daisy flowers:
- Open Gravity R and navigate to the Patterns section.
- Select the style as “natural” and click Generate Image after describing your desired pattern (e.g., “a pattern with daisy flowers”).
Once the pattern is created, you can download it and add it to mockups just as we did with wall art. For instance, you can see how this pattern looks stunning on a pillow. Similarly, you can create patterns for wallpapers, banners, clothing, and much more.
Creating patterns is a versatile way to cater to different markets while showcasing your creativity.
05 Creating T-Shirt Designs:
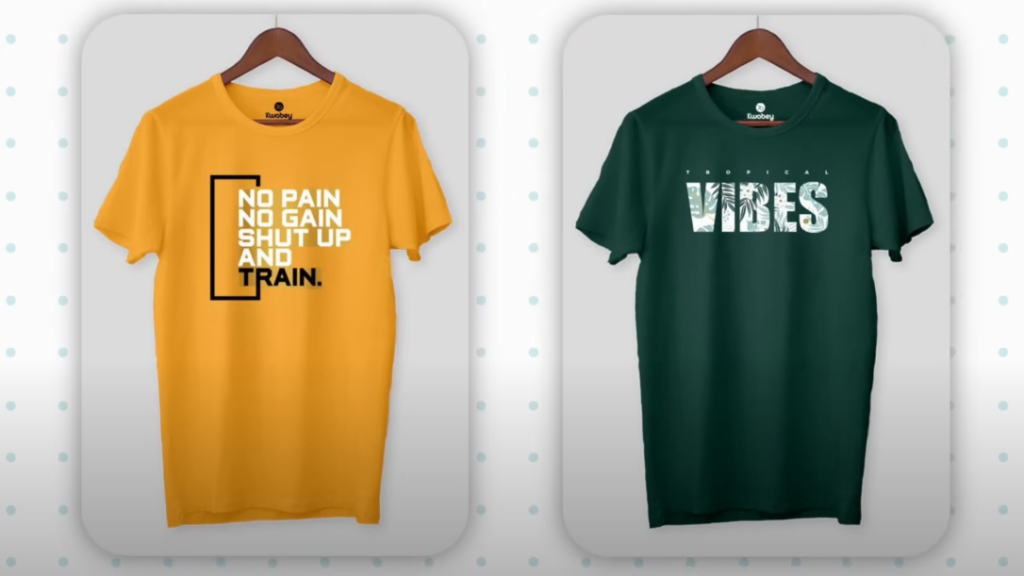
Next on the list is t-shirt design—a popular choice across all age groups, from teens to adults. You can create and sell custom t-shirt designs featuring anime characters, quotes, or other trending ideas.
Example of Success:
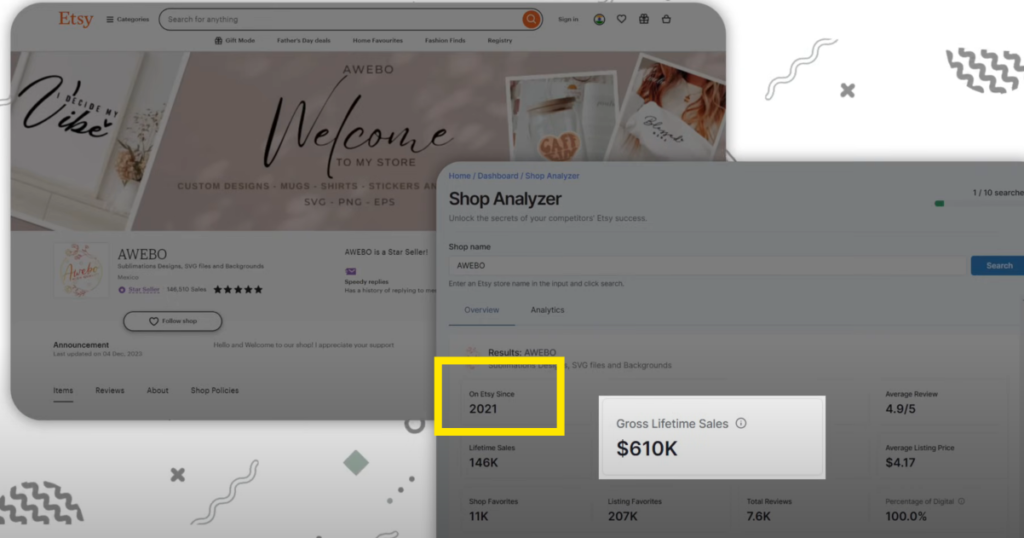
A shop with over 100,000 sales earned around $610,000 in just 3 years, averaging $1,944 monthly!
How to Create T-Shirt Designs:
To create t-shirt designs, follow these steps:
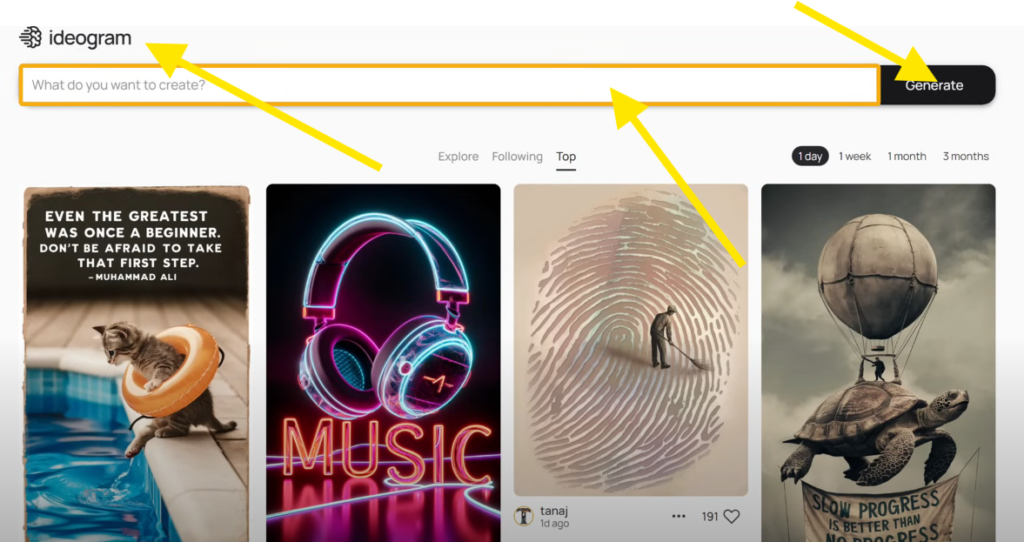
- Use a tool like IDR to generate high-quality images with text.
- Enter your desired t-shirt design description, such as “a design with the quote ‘Be Cool, Have Fun’.”
- For better results, turn on the Magic Prompt option.
- Select the aspect ratio for your design and click Generate.
You’ll get four different variations of the design. Please choose the one you like, download it, or regenerate it for new options.
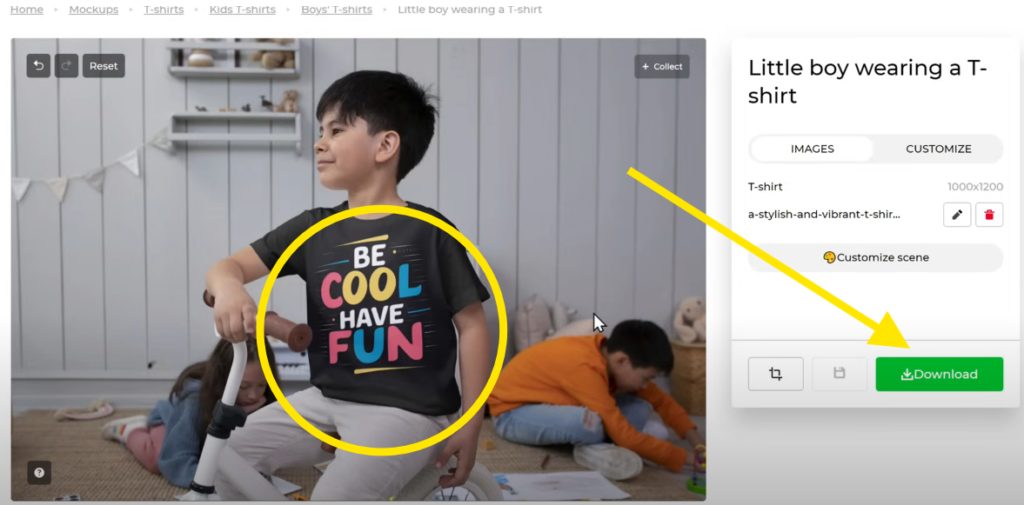
Once your design is ready, enhance its presentation with Smart Mockups, which offers amazing mockups for t-shirt designs. Upload your design, and you’ll get a professional preview, making it easier to attract customers.
Creating Wedding Invitations:
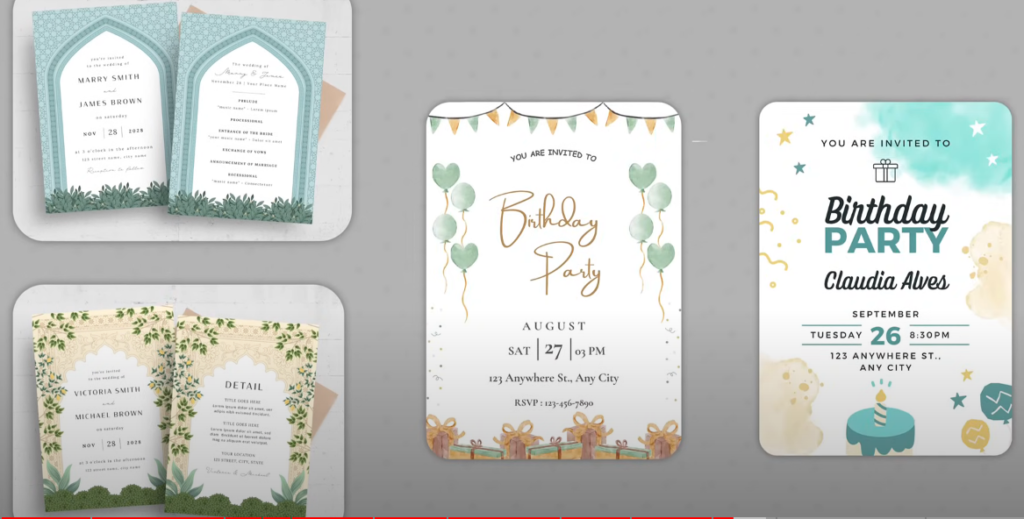
Another high-demand digital product you can create using AI is wedding invitations. With the increasing trend of sending digital invitations, there’s a huge demand for editable and downloadable templates for weddings, birthdays, and other special events.
Example of Success:
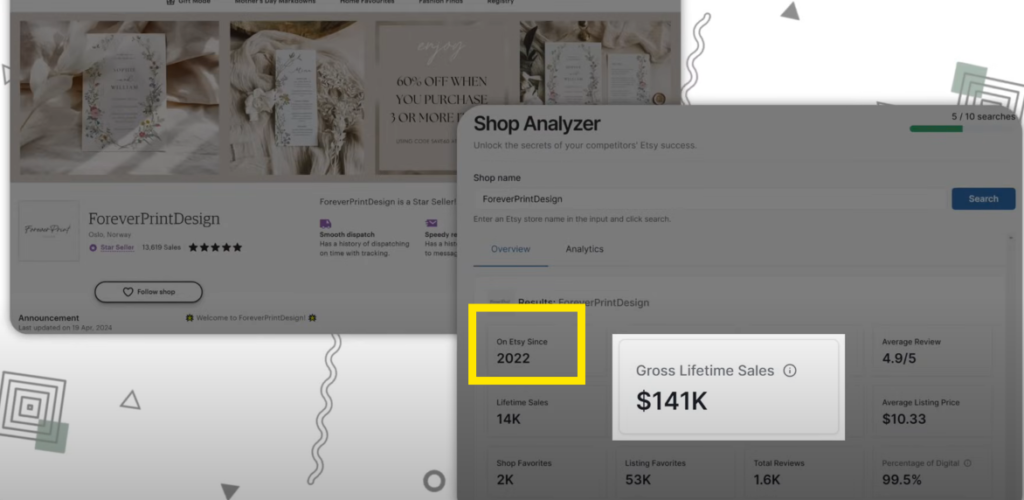
A shop called Forever Print Design has achieved around 14,000 sales on wedding invitations alone, generating $141,000 in 2 years, which equals an average of $5,800 per month.
How to Create Wedding Invitations:
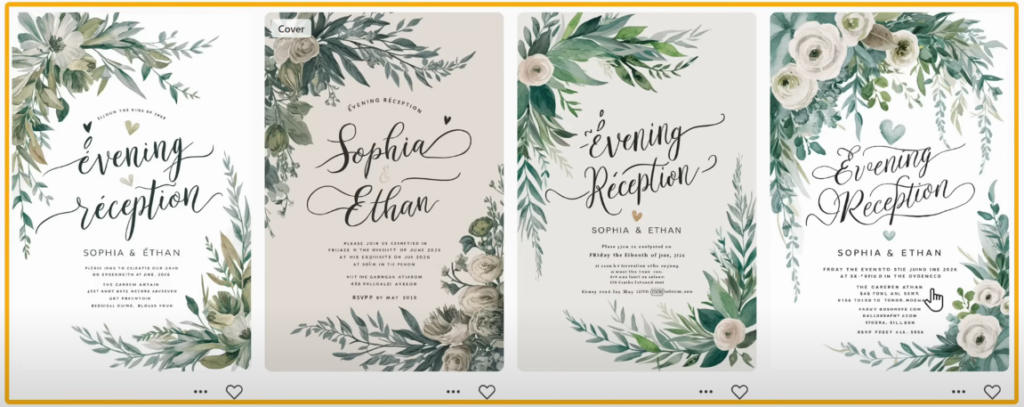
Using AI tools, you can create elegant and customizable invitation templates. These templates allow users to easily download and edit designs to fit their preferences. Wedding invitations are especially lucrative, but don’t forget to explore designs for birthdays, anniversaries, and other milestones!
With these ideas, you’re equipped to start creating and monetizing unique digital products.
Creating Wedding Invitations:
Step 1: Designing the Invitation
To create a wedding invitation using AI:
- Go to IDE and enter the type of wedding invitation you want to create.
- Include the details such as:
- Names of the bride and groom
- Wedding date
- Venue information
- Select the aspect ratio and click Generate.
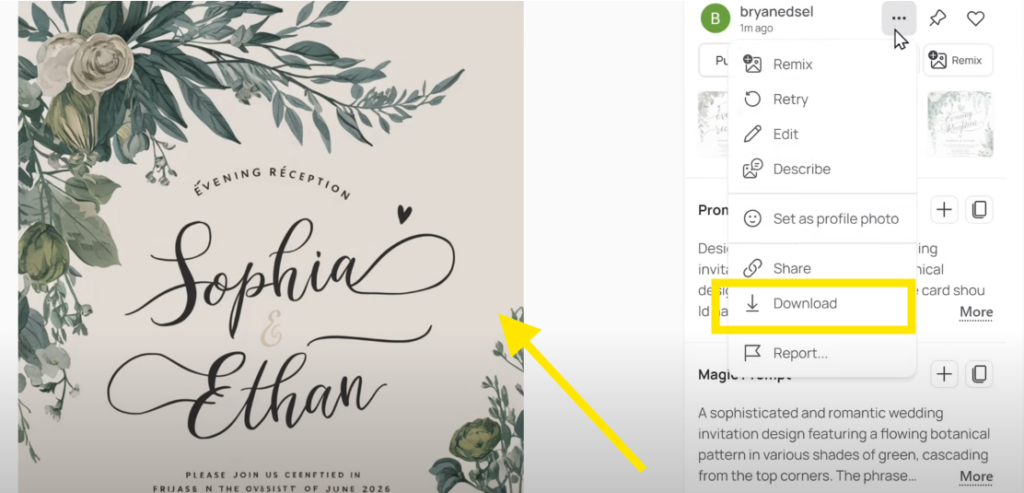
AI will produce beautiful designs for your wedding invitation. Browse the options, select the one you like, and download it.
Step 2: Making the Invitation Editable
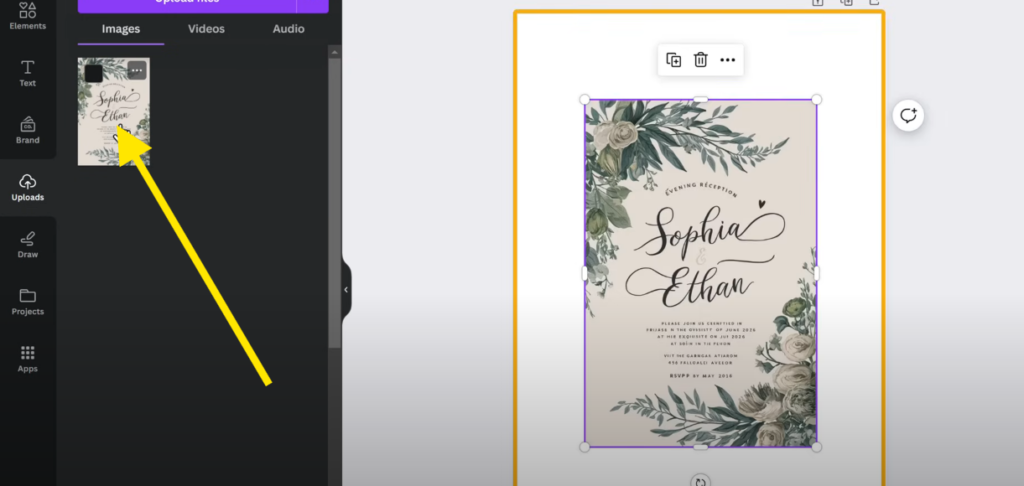
To make the design editable for your customers:
- Click the link to Canva (provided in the tutorial).
- Log in using your Google account.
- Once logged in, search for “wedding invitation” and click the plus icon to create a new design.
- Upload your wedding invitation design:
- Select File & click Upload to add your file.
- Right-click the uploaded image and select Set Image as Background.
Step 3: Editing Text on Canva
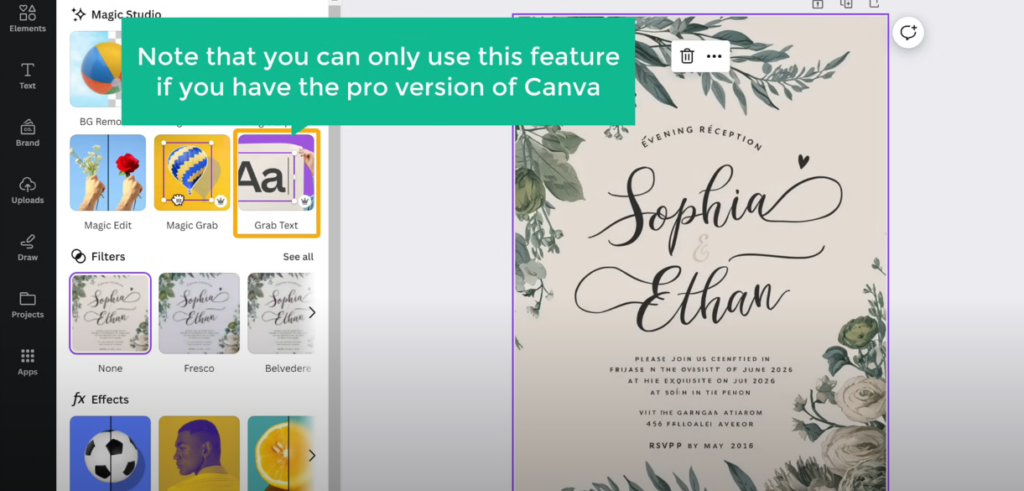
https://www.canva.com/To allow text customization:
- Click on Edit Photo and select the Grab Text option.
- Note: This feature is only available with the Canva Pro version. You can explore their paid plans for access.
- Use Grab Text to make specific parts of the text editable:
- Click on individual text elements or select All Text to make all text editable.
- Modify the text:
- Click on the text field you want to change, type in the new text, and it will update automatically.
Step 4: Sharing an Editable Template Link
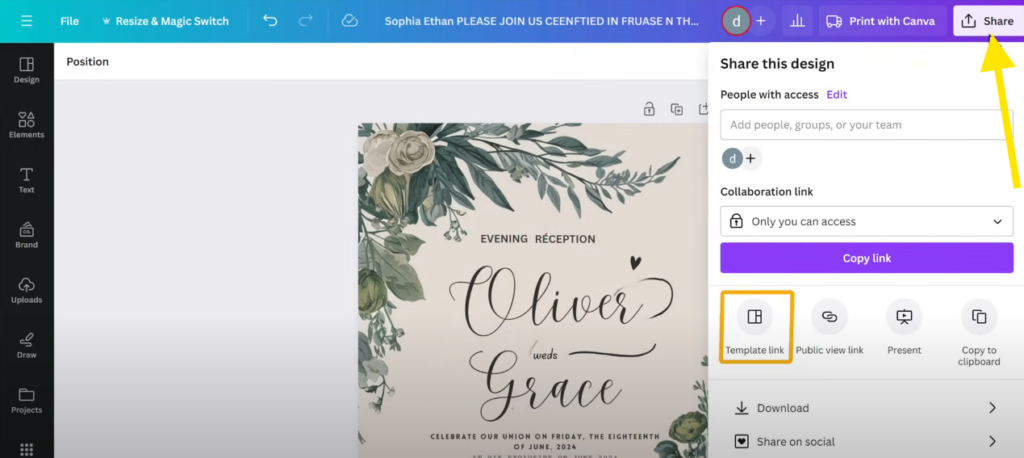
https://www.canva.com/To let your customers edit their purchased invitation:
- Click Share in Canva.
- Select Canva Template Link and then click Create Template Link.
- Canva will generate a unique link that allows customers to duplicate and edit the design.
Step 5: Delivering the Editable Template
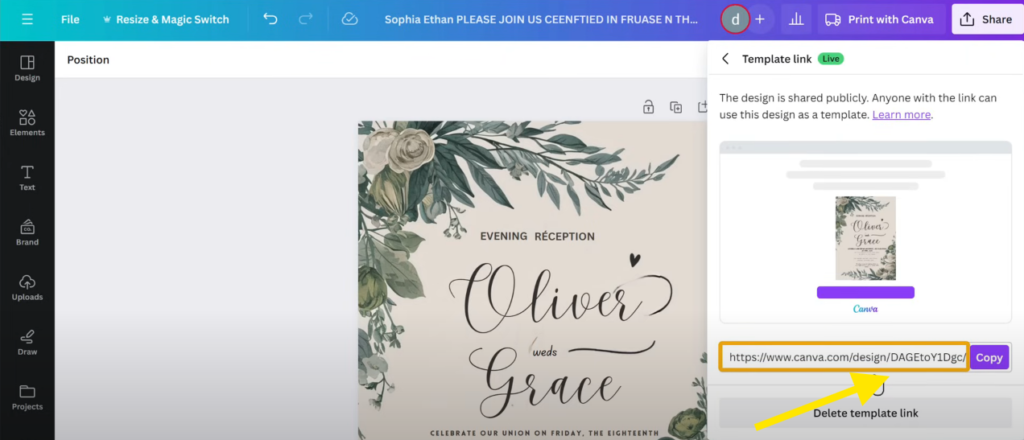
Provide the Canva template link to your customers through a downloadable PDF:
- Use a pre-designed PDF template (e.g., a thank-you document with instructions).
- Copy the Canva template link and insert it into the document’s text (e.g., “Click here to edit your wedding invitation”).
- Save the document as a PDF file:
- Go to File > Download > Select PDF.
Step 6: Uploading to Etsy
Once your PDF file is ready:
- Add it as a downloadable product on your Etsy shop.
- Customers who purchase your design will receive the PDF, including the Canva template link, allowing them to edit and personalize the invitation.
By following these steps, you can create, customize, and sell editable wedding invitations efficiently.
Creating and Selling Business Cards:
Why Sell Business Cards?
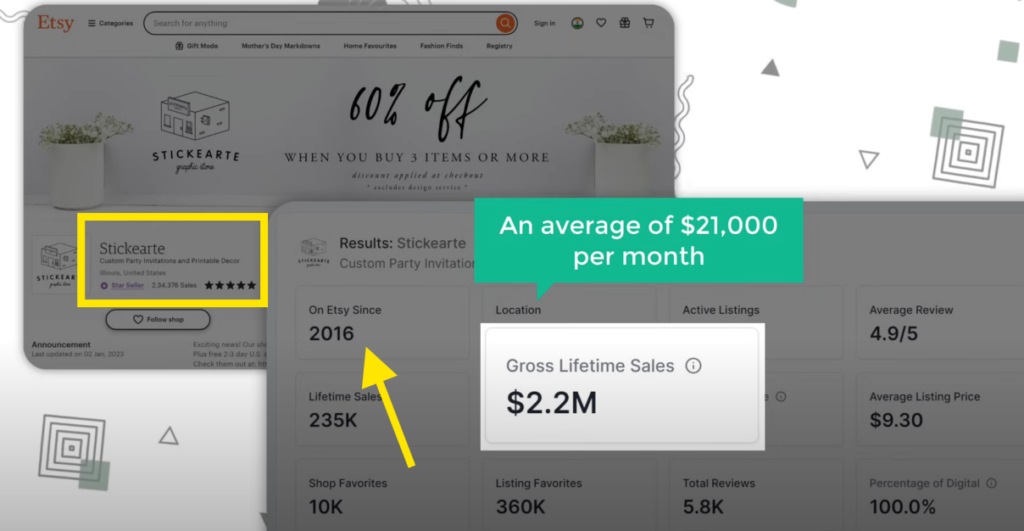
For professionals, business cards are essential. They offer a quick and professional way to share contact details and boost brand visibility. As a seller, you can create customizable templates and sell them repeatedly. Buyers can easily download and edit these templates to suit their needs.
For example, over the past 8 years, a shop has sold over 200,000 business cards, generating $2.2 million in revenue—an average of $21,000 per month! This demonstrates the potential profitability of selling business cards.
Step 1: Designing Business Cards:
To create business cards using AI:
- Go to IDAG and describe the type of business card you want to create.
- Select the aspect ratio of 16:9, which is standard for business cards.
- Click Generate to create the design.
You’ll receive four different business card designs. Browse the options, select the one you like, and download it.
Step 2: Making Business Cards Editable:
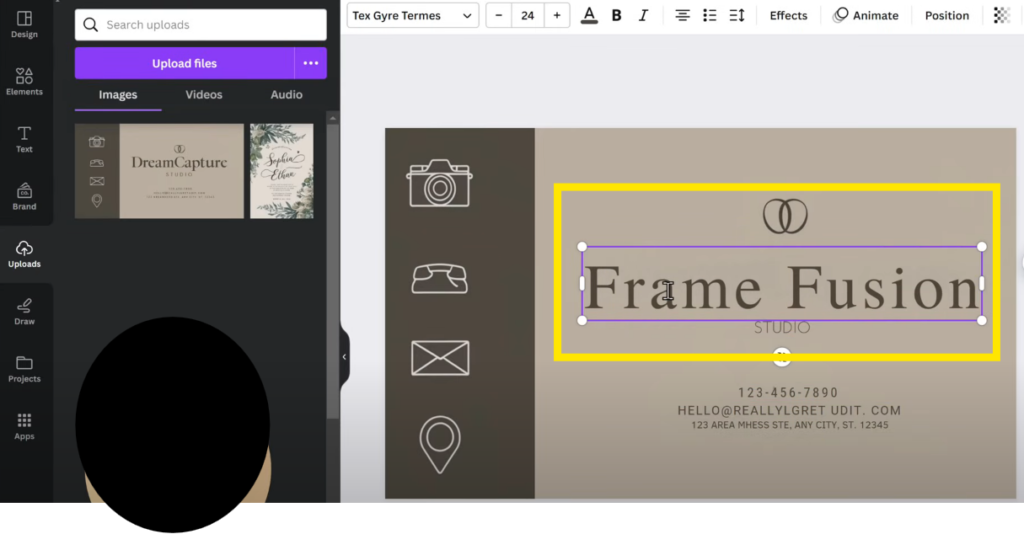
Just like with wedding invitations, you can make business cards editable using Canva:
- Upload the business card design to Canva.
- Set the image as the background by right-clicking and selecting Set Image as Background.
- Use the Grab Text feature (available in Canva Pro) to make text fields editable.
- Edit placeholders such as name, title, and contact information to create customizable templates.
Once completed, generate a Template Link in Canva.
Step 3: Sharing Editable Templates:
To deliver the editable business card design to your customers:
- Copy the Canva template link.
- Insert the link into a PDF document with instructions for the buyer.
- Save the document as a PDF file and upload it to your Etsy shop.
Maximizing Profits by Selling on Your Own Website:
While selling on platforms like Etsy is convenient, it often comes with commission fees. To keep 100% of your profits, consider creating your own e-commerce website.
Why Choose WebSpace Kit?
With WebSpace Kit, you can:
- Launch a WordPress site with no technical skills required.
- Get a free domain, free SSL, and access to thousands of free themes and plugins.
- Use their drag-and-drop builder to create your site effortlessly.
If you sign up using the link provided, you’ll receive an exclusive 10% discount.
Summary: Seven Digital Products to Sell
These are the seven profitable digital products you can create and sell using AI:
- Clip Art
- Coloring Worksheets
- Wall Art
- Patterns
- T-Shirt Designs
- Wedding Invitations
- Business Cards
By following these steps, you can easily start selling digital products and generating income.


